In this tutorial, you will learn how to import a Flat File data to SQL Server Database using SSIS.
Example:
We have a Text File which contains Credit Card Details with Pipe Delimiter and we will import this data in SQL Server Database Table.
Prerequisite:
Step 1: Open Notepad and copy the below Credit Card Details to the notepad file and save the file as CreditCardDetails.txt
Step 2: Run SQL Server Management Studio, connect with database and run below script to create Credit Card Detail Table.
Step 3: Run SQL Server Data Tools.
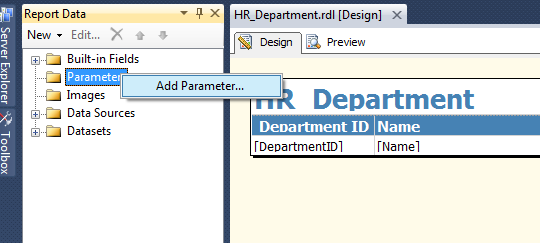
If already created in previous tutorial(s), open the existing project SSIS-Tutorials.
Step 4: Add new package to the Project. Name the package ImportFlatFile

Step 5: Add Data Flow Task to Control Flow Tab

Double Click Data Flow Task to switch to Data Flow Tab.
Step 6: Add and Configure Flat File Source


Step 7: Add and Configure SQL Server Destination


Step 8: Add and Configure Data Conversion Transformation


Step 9: Update mapping in SQL Server Destination

We are done with creating the package. Now let's run and test the package

Package executed successfully and transmitted 9 rows to SQL Server Destination Table.
Now let's run a query in SQL Server Management Studio and check the table

Example:
We have a Text File which contains Credit Card Details with Pipe Delimiter and we will import this data in SQL Server Database Table.
Prerequisite:
- SQL Server 2012 with SSIS installed:
- SQL Server Data Tools
- SQL Server Management Studio
- Text file with Credit Card Details.
Step 1: Open Notepad and copy the below Credit Card Details to the notepad file and save the file as CreditCardDetails.txt
CustomerId|CreditCardNo|TansactionType|Date|Amount
C00000001|SBI000000001|DR|1/1/2016|2500.00
C00000002|CAN000000001|DR|1/1/2016|2800.00
C00000001|SBI000000001|CR|2/1/2016|25.00
C00000003|SBI000000002|DR|2/1/2016|1485.00
C00000004|SBI000000003|DR|3/1/2016|2528.45
C00000002|CAN000000001|CR|4/1/2016|14.00
C00000003|SBI000000002|CR|4/1/2016|37.13
C00000004|SBI000000004|DR|5/1/2016|1000.00
C00000005|CAN000000002|DR|5/1/2016|3000.20
Step 2: Run SQL Server Management Studio, connect with database and run below script to create Credit Card Detail Table.
CREATE TABLE CreditCardDetails(
    CustomerId      VARCHAR(50),
    CreditCardNo    VARCHAR(50),
    TansactionType  CHAR(2),
    TransactionDate DATETIME,
    Amount          NUMERIC(18,2)
)
Step 3: Run SQL Server Data Tools.
If already created in previous tutorial(s), open the existing project SSIS-Tutorials.
Step 4: Add new package to the Project. Name the package ImportFlatFile

Step 5: Add Data Flow Task to Control Flow Tab

Double Click Data Flow Task to switch to Data Flow Tab.
Step 6: Add and Configure Flat File Source
- Add Flat File Source to the Data Flow Task from the Toolbox

- Double Click on Flat File Source. This will open a pop up window Flat File Source Editor.
- Click New Button will pop up another window Flat File Connection Manager Editor.
- In General Tab Browse the file CreditCardDetails.txt

- In Columns Tab, select Vertical Bar {|} as Column delimiter and click Refresh. This will preview the data like below

- Click OK twice to close the pop up windows.
Step 7: Add and Configure SQL Server Destination
- Add SQL Server Destination.
- Connect Flat File Source to SQL Server Destination.

- Double Click SQL Server Destination. This will open SQL Destination Editor window.
- Select the Shared Data Connection if not selected we created in Step 2.
- Select Table CreditCardDetails

- On Mapping Tab Map Input Column with Destination Column like below. Input Column and Destination column with same names are automatically mapped, otherwise you have to manually map. Here we have manually map Data and Transaction Date as the names are different

- Click OK to close the Destination Editor window. At this stage we are done with configuration of SQL Server Destination but there is a data conversion error between the source and destination data types.

- All the columns that we are loading from Flat file have string type but in SQL Server Table there are two columns which have DateTime and Numeric Data Type. For this we need to place Data Conversion Transformation between the Source and Destination to make it compatible
Step 8: Add and Configure Data Conversion Transformation
- Delete the connector between Flat File Source and SQL Server Destination
- Add Data Conversion Transformation
- Connect Flat File Source to Data Conversion
- Connect Data Conversion to SQL Server Destination

- Double Click Data Conversion and configure like below.

Step 9: Update mapping in SQL Server Destination
- Double Click SQL Server Destination and select Mapping Tab
- Update the mapping for Date and Amount Columns like below

We are done with creating the package. Now let's run and test the package

Package executed successfully and transmitted 9 rows to SQL Server Destination Table.
Now let's run a query in SQL Server Management Studio and check the table
SELECT * FROM CreditCardDetails