Mar 5, 2016

Aggregate Transformation in SSIS

In this tutorial, you will learn about Aggregate Transformation in SSIS with an Example.

Aggregate Transformation is used in Data Flow Task to aggregate the data like Sum, Max, Min, Avg etc.

Example
We have a Table in SQL Server Database which stores Employees Salary. We will first create an OLE DB Connection to fetch the data from the database and will perform Aggregate Transformation on the data to calculate Sum, Max & Min salary for each department and Aggregated data will be then exported to a Flat file with pipe {|} delimiter.

Prerequisites
  • SQL Server with SSIS
  • SQL Server Data Tools
  • SQL Server Management Studio

Step 1: Run SQL Server Management Studio, connect to database and run below script to create Employee Salary Table with some data
create table EmpSalary(
    EmpId  char(6),
    DeptId int,
    Salary numeric(18,2)
)
insert into EmpSalary values
('EMP001',1,50000),
('EMP002',2,40000),
('EMP003',2,25000),
('EMP004',2,20000),
('EMP005',3,30000),
('EMP006',3,13000),
('EMP007',4,23000),
('EMP008',5,17000)

Step 2: Run SQL Server Data Tools
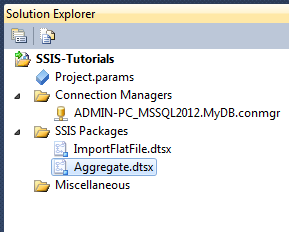
If already created in previous tutorial(s), open the existing project SSIS-Tutorials.

Step 3: Add new package to the project. Name the package Aggregate.

New Package

Step 4: Add Data Flow Task to Control Flow Tab

Data Flow Task

  • Double Click Data Flow Task to switch to Data Flow Task Tab.

Step 5: Add and Configure OLE DB Source
  • Add OLE DB Source.
OLE DB Source

  • Double Click OLE DB Source will open OLE DB Source Editor window.
  • Select the Shared Data Connection if not selected we created in Step 2.
  • Select Table EmpSalary.

OLE DB Source Editor

Step 6: Add and Configure Aggregate Transformation
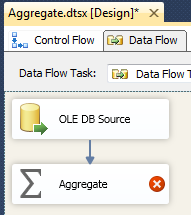
  • Add Aggregate to Data Flow Task.
  • Connect OLE DB Source to Aggregate.

Add Aggregate Transformation

  • Double Click Aggregate to open Aggregate Transformation Editor and configure the columns like below to find Sum, Max & Min of Salary Department-wise.

Configure Aggregate Transformation

Step 7: Add and Configure Flat File Destination
  • Add Flat File Destination.
  • Connect Aggregate to Flat File Destination.

Add Flat File Destination

  • Double Click Flat File Destination to open Flat File Destination Editor.
  • Click New to open a Flat File Format window.

Flat File Destination Editor

  • Click OK to open Flat File Connection Manager Editor.
  • Click Browse to configure the Flat File Path and Name. Browse the path and name DeptWiseSalary in the File Name. File will be automatically created.

Flat File Connection Manager Editor

  • Click Open to close the Browser window
  • In Flat File Connection Manager Editor tick the check-box Column names in the first data row to export the column names otherwise data will be exported without the column names

Flat File Connection Manager Editor

  • Switch to Columns Tab on Flat File Connection Manager Editor.
  • Select Vertical Bar {|} as Column Delimiter.

Flat File Connection Manager Editor

  • Click OK to close Flat File Connection Manager Editor.
  • Switch to Mappings Tab on Flat File Destination Editor and configure like below.

Mapping

  • Click OK to close Flat File Destination Editor

At this step we are done with creating the package. Let's execute the package.


Execute Package

Package executed successfully. Now let's browse the Flat File Path and check if file is created.

File Path

Now let's Open the File and check if data is exported.

Output

Contactmeasap

Mar 4, 2016

Shared Connection Manager SSIS

Connection Manager in SSIS is used to connect to various data sources such as Relational Databases, Analysis Services Databases, Flat Files and files in CSV and XML formats.

A Connection Manager can be created at
  • Project Level: Available to all the packages. That is why it is also called as shared Connection Manager. 
  • Package Level: Available to the specific package

In Real Life Projects,
  • We create connection manager at project level when we have to connect to same data source for various packages such as OLE DB Connection Manager. We use OLE DB connection Manager to connect to SQL Server which is generally required to connect in various packages. 
  • We create connection manager at package level when we have to connect to a particular data source for a specific package such as Flat File Connection Manager. We use Flat File Connection Manager to import/export data to a flat file which is generally specific to a particular package.

Refer this tutorial where we have used both project/package level Connection Manager. Project level to connect to SQL Server Database and package level to import the data from a flat file.


In this post, we will see how to create a Shared Connection Manager i.e. Connection Manager at Project Level. we will create OLE DB Connection Manager to connect to SQL Server and we will use the same in various packages that we will create/created in various tutorials on the blog.

Step 1: Run SQL Server Data Tools. Create a New SSIS Project SSIS-Tutorials.

Step 2: Right Click Connection Managers in the Solution Explorer and Add New Connection Manager

This will open SSIS Connection Manager. Select OLEDB from the available sources and click Add


This will open Configure OLE DB Connection Manager Window. Click New


This will open Connection Manager window. Select SQL Server and provide Authentication to logon to SQL Server and select Database and click Ok


At this step we are done with creating the shared Connection Manager which would start appearing under Connection Managers like below.

Feb 27, 2016

Import Flat File to SQL Server with SSIS

In this tutorial, you will learn how to import a Flat File data to SQL Server Database using SSIS.

Example:
We have a Text File which contains Credit Card Details with Pipe Delimiter and we will import this data in SQL Server Database Table.

Prerequisite:
  • SQL Server 2012 with SSIS installed:
  • SQL Server Data Tools
  • SQL Server Management Studio
  • Text file with Credit Card Details.

Step 1: Open Notepad and copy the below Credit Card Details to the notepad file and save the file as CreditCardDetails.txt
CustomerId|CreditCardNo|TansactionType|Date|Amount C00000001|SBI000000001|DR|1/1/2016|2500.00 C00000002|CAN000000001|DR|1/1/2016|2800.00 C00000001|SBI000000001|CR|2/1/2016|25.00 C00000003|SBI000000002|DR|2/1/2016|1485.00 C00000004|SBI000000003|DR|3/1/2016|2528.45 C00000002|CAN000000001|CR|4/1/2016|14.00 C00000003|SBI000000002|CR|4/1/2016|37.13 C00000004|SBI000000004|DR|5/1/2016|1000.00 C00000005|CAN000000002|DR|5/1/2016|3000.20

Step 2:
Run SQL Server Management Studio,  connect with database and run below script to create Credit Card Detail Table.
CREATE TABLE CreditCardDetails(
    CustomerId      VARCHAR(50),
    CreditCardNo    VARCHAR(50),
    TansactionType  CHAR(2),
    TransactionDate DATETIME,
    Amount          NUMERIC(18,2)
)

Step 3: Run SQL Server Data Tools.
If already created in previous tutorial(s), open the existing project SSIS-Tutorials.

Step 4: Add new package to the Project. Name the package ImportFlatFile


Step 5: Add Data Flow Task to Control Flow Tab

Data Flow Task

Double Click Data Flow Task to switch to Data Flow Tab.

Step 6: Add and Configure Flat File Source
  • Add Flat File Source to the Data Flow Task from the Toolbox

Flat File Source

  • Double Click on Flat File Source. This will open a pop up window Flat File Source Editor.
  • Click New Button will pop up another window Flat File Connection Manager Editor.
  • In General Tab Browse the file CreditCardDetails.txt

Flat File

  • In Columns Tab, select Vertical Bar {|} as Column delimiter and click Refresh. This will preview the data like below

Column Delimiter

  • Click OK twice to close the pop up windows.

Step 7: Add and Configure SQL Server Destination
  • Add SQL Server Destination.
  • Connect Flat File Source to SQL Server Destination.

SQL Server Desitnation

  • Double Click SQL Server Destination. This will open SQL Destination Editor window.
  • Select the Shared Data Connection if not selected we created in Step 2.
  • Select Table CreditCardDetails

SQL Destination Editor

  • On Mapping Tab Map Input Column with Destination Column like below. Input Column and Destination column with same names are automatically mapped, otherwise you have to manually map. Here we have manually map Data and Transaction Date as the names are different

Mapping

  • Click OK to close the Destination Editor window. At this stage we are done with configuration of SQL Server Destination but there is a data conversion error between the source and destination data types.

Data Conversion Error

  • All the columns that we are loading from Flat file have string type but in SQL Server Table there are two columns which have DateTime and Numeric Data Type. For this we need to place Data Conversion Transformation between the Source and Destination to make it compatible

Step 8: Add and Configure Data Conversion Transformation
  • Delete the connector between Flat File Source and SQL Server Destination
  • Add Data Conversion Transformation
  • Connect Flat File Source to Data Conversion
  • Connect Data Conversion to SQL Server Destination

Data Conversion

  • Double Click Data Conversion and configure like below.

Configure Data Conversion

Step 9: Update mapping in SQL Server Destination 
  • Double Click SQL Server Destination and select Mapping Tab
  • Update the mapping for Date and Amount Columns like below

Update Mapping

We are done with creating the package. Now let's run and test the package

Package Execution

Package executed successfully and transmitted 9 rows to SQL Server Destination Table.

Now let's run a query in SQL Server Management Studio and check the table
SELECT * FROM CreditCardDetails
Table Output

Feb 18, 2016

Sum up Time Field in SQL Server

Yesterday, one of a member Murali Krishna Rayudu in a Facebook Group MSBI Query Cracker's post the requirement to calculate Total Working Hours. In the scenario there was a column with Time Data Type and had the values for hours worked and the requirement was to sum up the time to calculate Total Hours worked. At first go, it looks straight forward as we have aggregate function  SUM to sum up column values, but it's not because sum of a column with TIME data type is not supported in SQL Server

NOTE: Time Data Type was introduced in SQL Server 2008

Let's try to sum up the values of a column with Time Data Type with SUM
declare @tab table(col time)
insert into @tab values
('01:15:23'),('12:15:41'),('15:45:12')
select SUM(col) from @tab
Error with SUM for Time datatype

Look, we get the above error. So, it is concluded that aggregate functions not work on Time Data Type in SQL Server.

Solution to above I provided the following script to calculate the same on the post itself and thought of sharing the same on by blog. In the below script I have provided two ways.
declare @tab table(col time)
insert into @tab values
('01:15:23'),('12:15:41'),('15:45:12')

--Solution-1
select right('0'+cast(sum(DATEPART(hh,col)) + (sum(DATEPART(mi,col)) + (sum(DATEPART(S,col))/60))/60 as varchar),2)
       +':'+right('0'+ cast((sum(DATEPART(mi,col)) + (sum(DATEPART(S,col))/60))%60 as varchar),2)
       +':'+ right('0'+ cast(sum(DATEPART(s,col))%60 as varchar),2)
from @tab

--Solution-2
select cast(secs/3600 as varchar)
       +':'+cast((secs-(secs/3600)*3600)/60 as varchar)
       +':'+cast(secs%60 as varchar)
from( 
   select sum((DATEPART(HH,col)*3600)+(DATEPART(mi,col)*60)+DATEPART(S,col)) secs
   from @tab
) t
Total working Hours

Feb 1, 2016

Filter Parameter in SSRS

In this article you will lean what is Filter Parameter in SSRS and how it works with an example.

Filter Parameter(s) are used to filter the result on the report once the data is fetched from the database. It is alternate to Query Parameter to filter the result, but not efficient as it filters the data on the front end which lead to fetching all the data from the database and increasing the network flow

Let's create a report to see how Filter Parameter works.

Step 1: Create a simple Tabular Report
  • First Create a simple Tabular Report using above link. Once report is created we would apply Filter Parameter on the report.

Step 2: Add and configure Parameter
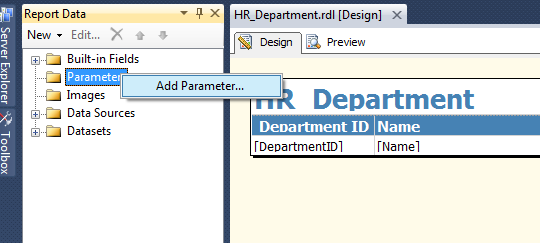
  • On Report Data Tab, Click Parameters and Add Parameters

 Filter Parameter-01

  • Configure Report Parameter properties as below and click OK

Report_Parameter

  • This will add GroupName Parameter under Parameters like below.

Parameter Added

Step 3:  Add Filter Parameter
  • In Report Data Tab right click DataSet1 under Datasets and then click Dataset Properties

ds_prop

  • Select Filter Tab and Add Filter. Click fx and select Parameter GroupName as value in the pop up window.

Configure Filter


We are done with adding Filter Parameter to the Report.

Now let's build the Solution and run the report. The Parameter GroupName that we created in step 2 is appearing in the report to filter the result set.

Enter Manufacturing in the text-box and click View Report

Report Output

Look at the output, the report data is filtered with Group Name as Manufacturing

Jan 1, 2016

Paging in SSRS

Paging is used to display N no. of records per page.  In this post, you will see step by step example of implementing paging in SSRS.

Basic steps to implement paging in SSRS are:
  • Create a simple Tabular Report
  • Create a column S.No which generates an incremental number using RowNumber function
  • Grouping using function to display N records on each page.

Let's create a report to see
For this, we will continue on a Tabular Report we created in an earlier article.

Step 1: Create a simple Tabular Report

First Create a simple Tabular Report using above link. Report looks like below.

Paging-01

Step 2: Create a column S.No with RowNumber
  • S.No column would generate an incremental number.
  • Expression : RowNumber(Nothing)
How to add S.No Column using RowNumber

Paging-02

Step 3: Grouping using function to display N records on each page.
  • Right click Data Region, Then Add Group>Parent Group
Paging-03

  • Click fx and write below Formula in Expression window

Paging-04

Paging-05

Note: At this state if you will run the report you will get below error

Paging-06
To overcome this error, we need to delete Sort Expression in Group Properties

Right Click Group > Group Properties

Paging-07

Select Sorting Tab and delete the existing Sort Expression appearing in the below screen

Paging-08

Select Page Breaks Tab and select the option Between each instance of a group

Paging-09

We are done with implementing paging at this state. Let's run the report and check the output

Output of the Report
Page 1
Paging-10
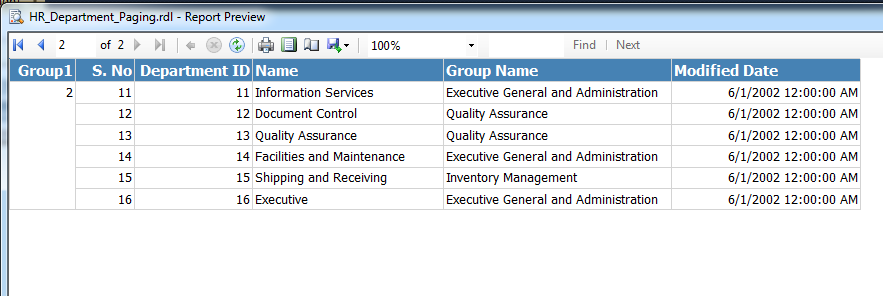
Page 2
Paging-11

Group1 column is not required in the ouptut, so you can right Click and delete this column using Delete Columns only option

Paging-12