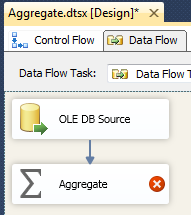
In this tutorial, you will learn about Aggregate Transformation in SSIS with an Example.
Aggregate Transformation is used in Data Flow Task to aggregate the data like Sum, Max, Min, Avg etc.
Example
We have a Table in SQL Server Database which stores Employees Salary. We will first create an OLE DB Connection to fetch the data from the database and will perform Aggregate Transformation on the data to calculate Sum, Max & Min salary for each department and Aggregated data will be then exported to a Flat file with pipe {|} delimiter.
Prerequisites
Step 1: Run SQL Server Management Studio, connect to database and run below script to create Employee Salary Table with some data
Step 2: Run SQL Server Data Tools
If already created in previous tutorial(s), open the existing project SSIS-Tutorials.
Step 3: Add new package to the project. Name the package Aggregate.
Step 4: Add Data Flow Task to Control Flow Tab
Step 5: Add and Configure OLE DB Source
Step 6: Add and Configure Aggregate Transformation
Step 7: Add and Configure Flat File Destination
At this step we are done with creating the package. Let's execute the package.
Package executed successfully. Now let's browse the Flat File Path and check if file is created.
Now let's Open the File and check if data is exported.
Aggregate Transformation is used in Data Flow Task to aggregate the data like Sum, Max, Min, Avg etc.
Example
We have a Table in SQL Server Database which stores Employees Salary. We will first create an OLE DB Connection to fetch the data from the database and will perform Aggregate Transformation on the data to calculate Sum, Max & Min salary for each department and Aggregated data will be then exported to a Flat file with pipe {|} delimiter.
Prerequisites
- SQL Server with SSIS
- SQL Server Data Tools
- SQL Server Management Studio
Step 1: Run SQL Server Management Studio, connect to database and run below script to create Employee Salary Table with some data
create table EmpSalary(
    EmpId  char(6),
    DeptId int,
    Salary numeric(18,2)
)
insert into EmpSalary values
('EMP001',1,50000),
('EMP002',2,40000),
('EMP003',2,25000),
('EMP004',2,20000),
('EMP005',3,30000),
('EMP006',3,13000),
('EMP007',4,23000),
('EMP008',5,17000)
Step 2: Run SQL Server Data Tools
If already created in previous tutorial(s), open the existing project SSIS-Tutorials.
Step 3: Add new package to the project. Name the package Aggregate.
Step 4: Add Data Flow Task to Control Flow Tab
- Double Click Data Flow Task to switch to Data Flow Task Tab.
Step 5: Add and Configure OLE DB Source
- Add OLE DB Source.
- Double Click OLE DB Source will open OLE DB Source Editor window.
- Select the Shared Data Connection if not selected we created in Step 2.
- Select Table EmpSalary.
Step 6: Add and Configure Aggregate Transformation
- Add Aggregate to Data Flow Task.
- Connect OLE DB Source to Aggregate.
- Double Click Aggregate to open Aggregate Transformation Editor and configure the columns like below to find Sum, Max & Min of Salary Department-wise.
Step 7: Add and Configure Flat File Destination
- Add Flat File Destination.
- Connect Aggregate to Flat File Destination.
- Double Click Flat File Destination to open Flat File Destination Editor.
- Click New to open a Flat File Format window.
- Click OK to open Flat File Connection Manager Editor.
- Click Browse to configure the Flat File Path and Name. Browse the path and name DeptWiseSalary in the File Name. File will be automatically created.
- Click Open to close the Browser window
- In Flat File Connection Manager Editor tick the check-box Column names in the first data row to export the column names otherwise data will be exported without the column names
- Switch to Columns Tab on Flat File Connection Manager Editor.
- Select Vertical Bar {|} as Column Delimiter.
- Click OK to close Flat File Connection Manager Editor.
- Switch to Mappings Tab on Flat File Destination Editor and configure like below.
- Click OK to close Flat File Destination Editor.
At this step we are done with creating the package. Let's execute the package.
Package executed successfully. Now let's browse the Flat File Path and check if file is created.
Now let's Open the File and check if data is exported.
Contactmeasap


No comments:
Write Comments